
General
The best ways to embed videos on your Website

Video has become an integral part of online content in today’s digital age, offering a dynamic and engaging way to communicate with audiences. Whether you’re a business looking to showcase your products, a blogger sharing tutorials, or an artist sharing your portfolio, incorporating video into your website can significantly enhance user experience and boost engagement. However, the process of putting video on your website involves more than just uploading a file. In this guide, we’ll explore the steps involved in processing and uploading video content to your website effectively.
1. Choose the Right Video Format:
Before you can upload a video to your website, you need to ensure it’s in the correct format. The most widely supported video formats for the web are MP4, WebM, and Ogg. MP4 is the most universally supported format and is compatible with most browsers and devices. WebM and Ogg are open-source formats that offer high-quality compression, making them ideal for web streaming. When exporting or converting your video, make sure to select one of these formats to ensure compatibility with your website.
2. Optimize Video File Size:
Large video files can slow down your website’s load time, leading to a poor user experience and potentially higher bounce rates. To avoid this, it’s essential to optimize your video file size before uploading it to your website. You can do this by compressing the video using video editing software or online compression tools. Aim to strike a balance between file size and video quality, ensuring that your video maintains good visual clarity while keeping the file size as small as possible.
3. Consider Video Hosting Options:
Once you’ve processed and optimized your video, you’ll need to decide where to host it. There are several hosting options available, each with its own pros and cons. You can host the video directly on your website’s server, but this may lead to bandwidth issues and slower load times, especially for larger files. Alternatively, you can use third-party video hosting platforms like YouTube, Vimeo, or Wistia. These platforms offer built-in video players, easy sharing options, and analytics tracking, making them a convenient choice for many website owners.
4. Embedding the Video:
Once you’ve chosen a hosting option, it’s time to embed the video on your website. Most video hosting platforms provide embed codes that you can copy and paste directly into your website’s HTML code. Alternatively, if you’re hosting the video on your server, you can use HTML5 video tags to embed the video directly into your webpage. Make sure to test the embedded video on different browsers and devices to ensure compatibility and smooth playback.
5. Optimize for SEO:
Finally, don’t forget to optimize your video for search engines to maximize its visibility and reach. This includes adding relevant keywords to the video title, description, and tags, as well as providing a transcript of the video content for accessibility and SEO purposes. Additionally, consider adding a compelling thumbnail image and a catchy title to encourage clicks and engagement.
In conclusion, adding video to your website can enhance its appeal and effectiveness in conveying your message to your audience. By following these steps to process and upload your video effectively, you can ensure seamless playback, fast load times, and maximum engagement with your content. So, start incorporating video into your website today and take your online presence to the next level.


Facebook Story Video Download – Professional Insights and Best Practices 2026
Ever seen a Facebook Story you wanted to save before it disappeared after 24 hours? You are not alone. With...
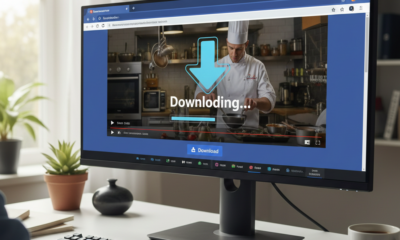

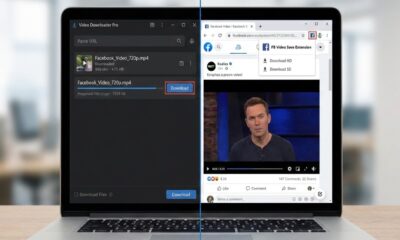
The Only Facebook Video Downloader You Need to Know in 2026
Are you looking for a reliable way to save Facebook videos for offline viewing, content reuse, or archiving, without compromising...


How to Download Instagram Videos by Link
Have you ever found an Instagram video you wanted to save instantly, without installing apps or risking your privacy? In...


Video DL Online Guide, Smart Techniques and Safe Downloads 2026
Have you ever wanted to save a Facebook video instantly, without installing risky software or losing quality?In 2026, video consumption...


HD Video Download HD – Complete Guide to High-Quality Video Downloads 2026
Are you frustrated with low-quality video downloads that look pixelated and blurry on your screen? In 2026, streaming has become...


Download Story Insta – Smart Tips and Safe Techniques to get Insta videos in 2026
Have you ever watched an Instagram story and wished you could save it before it disappears forever?Instagram stories remain one...


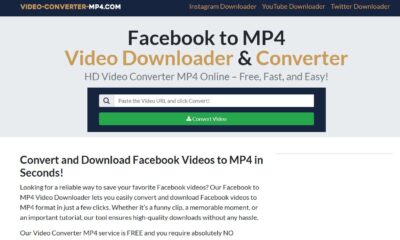
Facebook MP4 Downloader Online Guide, Creative Tips and Techniques 2026
Are you looking for a fast, safe, and reliable way to save Facebook videos in MP4 format without installing software?In...


A Guide to Using a Futures Contract Calculator to Unlock Profit Potential
As a trader, have you ever found yourself unsure about the potential profit or loss of a futures trading contract?...


A Timeless Way to Display Custom Funded Certificate Plaque
You worked hard to earn that certificate. Whether it represents funding approval, a financial milestone, a business achievement, or a...


Leveraging YouTube as a Game-Changer for Film Production Promotion
Filmmakers have a powerful ally in their quest to promote their productions: YouTube. As one of the largest video-sharing platforms...

 General1 year ago
Step-by-Step Guide: How to download Facebook Videos as MP4
- General5 months ago
Facebook Link Download Guide – Tips, Tools, and Techniques to save FB link videos 2026
- General5 months ago
Master Facebook Video Download by Link: Essential Guide 2026
- Web Resource2 years ago
Enhancing Your Video Web Content for Online Audiences
- General6 months ago
9 Best Facebook Video Downloader App Choices for 2026
- Web Resource6 months ago
Download Story Insta – Smart Tips and Safe Techniques to get Insta videos in 2026
- General6 months ago
7 Essential Free Online FB Video Downloader Tools for 2026
- Web Resource6 months ago
HD Video Download HD – Complete Guide to High-Quality Video Downloads 2026


You must be logged in to post a comment Login